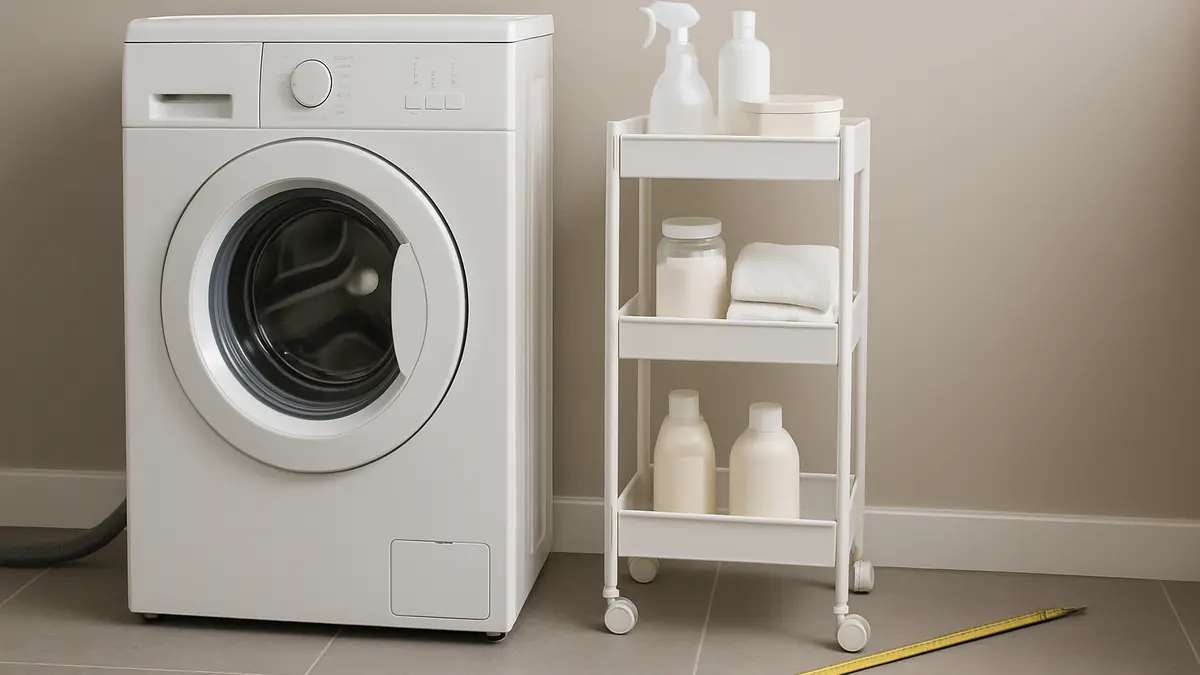
A narrow strip beside the washer can look like easy storage until a trolley catches on a hose, the machine shakes against it during spin, or you cannot reach a shut-off valve. The aim is not to fill every centimetre. It is to create storage that remains easy to remove, clean around and live with.
Quick answer: To organise gap beside washing machine safely, measure the tightest point and map every connection before buying anything. Choose only removable storage that does not touch the appliance, block its door or lid, or make hoses and valves difficult to reach. If the fit is uncertain, leave the gap clear.
Start with usable space, not the visible gap
The gap you see at the front is rarely the measurement that matters. A skirting board, floor trim, projecting tap, drain hose or uneven wall can make the space narrower farther back. The washer itself may also need room to move slightly during a spin cycle.
Measure the width in three places: close to the floor, at mid-height and near the top of the appliance. Record the smallest result. Then measure the depth from the front edge of the washer to the wall, and note where the gap becomes obstructed. A tape measure is useful, but a piece of cardboard cut to the proposed cart or bin width gives an even better reality check.
Do not measure only the storage item. Measure its handles, wheels, rim, pull-out clearance and anything you plan to place on its side. A trolley that is technically narrow enough can still be frustrating if it cannot pass a moulding or turn out of the gap.
Check the washer’s own clearance first
Your washer installation manual is the final authority. Clearance requirements vary by model, installation type and connection layout, so a figure from another machine is not a substitute for your own instructions.
Manufacturer examples show why this matters. One LG installation guide suggests at least 2 cm on both sides and 10 cm at the rear for ease of installation. LG’s front-loader checklist also specifies different spacing where the water supply is behind or beside the appliance. Whirlpool gives a different general recommendation and also advises readers to consult their specific installation manual.
Those figures are useful reminders, not a universal rule. Installation guidance also says spacing must allow for water lines, drain lines and airflow, with extra room sometimes needed for wall, door or floor mouldings. If your manual calls for more space than the gap offers, that gap is not storage space.
Confirm front, top and rear access
For a front-loader, open the door fully and check that a basket can still be carried past it. A storage unit beside the machine should not turn loading clothes into an awkward sideways manoeuvre. For a top-loader, check lid height and the space needed to stand comfortably at the opening.
Look behind the washer too. You need to be able to inspect water lines, the drain line and the power connection when needed. Do not compress, reroute, conceal or disconnect these connections to make a storage idea work. Photograph the rear connections before adding storage; it makes it easier to restore the layout after cleaning, a leak or a move.
Make a simple measurement and access map
Before choosing a solution, write down the following on a note in your phone. This small step prevents a hopeful purchase that becomes clutter a week later.
- The narrowest width at floor, middle and top level.
- The usable depth before a hose, valve, pipe, trim or wall projection.
- Where water supply, drain and electrical connections sit.
- Which way the washer door or lid opens and how far it needs to move.
- Whether the unit can be pulled out without shifting the washer.
- Whether you can still sweep, wipe or retrieve a dropped item from the space.
Also check the floor. A washer should stand on a solid, level surface to minimise noise and vibration. LG advises that all four levelling feet should contact the floor firmly and evenly. Storage should never be used to brace the appliance, hide an unstable foot or compensate for a machine that rocks.
If the washer already walks, rattles unusually or touches a wall during spin, solve that appliance issue before organising around it. LG warns that side panels rubbing a wall can amplify vibration and noise. A tight cart can create the same problem.
Choose the storage type that matches the gap
Once the gap has passed the access test, choose the least complicated option that solves your actual problem. The simplest setup is often the easiest to maintain.
| Gap situation | Best approach | Why it works |
|---|---|---|
| Clear width and a genuine pull-out path | Slim rolling cart | It can be removed for cleaning and connection checks. |
| Narrow gap with limited wheel clearance | Shallow removable bins | Individual containers are easier to lift out than a wedged trolley. |
| Useful vertical space but no safe side clearance | Freestanding caddy elsewhere nearby | It keeps supplies accessible without crowding the washer. |
| Hoses, valves, vibration or unclear manual requirements | Leave the gap empty | It preserves service access and avoids creating a hidden problem. |
When a rolling cart is a good fit
A slim cart suits a gap only when it can roll out smoothly while empty and loaded. Test the route with your cardboard template first. Choose a stable, low-profile form rather than a tall, heavily loaded unit, especially if the floor is uneven.
Use it for light, regularly used supplies: a small laundry pre-treatment bottle, pegs, cloths, a lint container or a few folded cleaning cloths. Keep containers closed and dry. Avoid making the top shelf a landing zone for large detergent bottles, since heavy weight high up can make a narrow trolley less stable.
Do not leave a cart permanently wedged between the wall and washer. There is no verified basis for treating a tight side gap as fixed storage during operation. Pull the cart out for periodic cleaning and confirm that it has not shifted into contact with the appliance.
When shallow bins are better
Shallow bins work well when wheels add too much width or when the floor has a lip. Pick containers you can grip and lift out in one motion. Open-top bins make supplies easy to see, but lidded containers can be more practical if dust, splashes or pet access are concerns.
Assign each bin one purpose: stain treatment, cloths, spare pegs or small laundry tools. Labels help, but keep them simple and place them on the front edge that remains visible. A bin system fails when you have to pull out several containers to find one item.
Keep the rear-most part of the gap free if it is needed for hoses or valves. The useful storage zone may be only the front half of the space, and that is fine. A small accessible bin is more useful than a deeper setup that hides a connection.
Use a vertical caddy when the side gap is not suitable
Sometimes the right answer is to stop treating the appliance gap as the storage location. A freestanding caddy beside a laundry basket, a narrow unit on an adjacent wall, or a removable organiser in a nearby cupboard can hold the same supplies without compromising access.
This is especially sensible in a rental. Avoid attaching shelves, hooks or anti-tip hardware to rented walls without permission. A freestanding option keeps the arrangement reversible and makes moving day easier. It also avoids drilling near plumbing or electrical connections.
Think one zone at a time. Keep washing supplies together, cleaning supplies elsewhere, and bulky back-up stock outside the immediate laundry area if possible. The goal is not a styled display; it is a clear path to load the washer, reach the controls and deal with maintenance without moving half the room.
Build in cleaning and leak checks
Storage beside a washer should make cleaning easier, not conceal dampness. Once a month, pull out the cart or bins, vacuum or wipe the floor, and look for lint, residue, moisture or a shifted hose. Check that every container is dry before putting it back.
Do not use the gap to hide a suspected leak. If you see water, stop treating the area as an organisation project and follow the appliance and tenancy guidance that applies to your situation. Clear access to the shut-off valve and rear connections matters more than keeping supplies out of sight.
It helps to keep a small amount of empty space around the chosen storage rather than filling every shelf. That breathing room lets you spot a problem, retrieve an item and remove the unit without a full laundry-room reset.
Final checklist before you organise gap beside washing machine
- Have you used the narrowest measurement, including trim and hoses?
- Does the washer manual permit the clearance you plan to keep?
- Can the storage be removed without moving or scraping the washer?
- Can you reach the water, drain and electrical connections when needed?
- Does the washer door or lid still open fully?
- Has the washer been levelled correctly, with no side contact during spin?
- Are heavy bottles low, stable and protected from moisture?
FAQ
Can I put a slim cart beside my washing machine?
Yes, but only if your washer’s installation requirements are maintained and the cart can be removed without contacting the machine or obstructing hoses, valves, cleaning or door access. Test it during a normal spin cycle and remove it if vibration brings it into contact with the washer.
How much clearance does a washing machine need at the side?
There is no single safe figure for every washer. Some manufacturer guidance gives example side clearances, but your specific model’s installation manual takes priority because connections and recessed installations differ.
What should I store beside a washing machine?
Choose light, contained laundry essentials that can be removed quickly. Avoid storing anything that makes a leak harder to notice, blocks a valve or becomes unstable when the washer vibrates.
If the space passes the measurements, access and vibration checks, use a light rolling cart or shallow bins and keep the setup removable. If it fails even one important check, move the storage elsewhere. A clear appliance gap is not wasted space when it protects your washer and makes maintenance straightforward.